


Elevator Rope Tension Meter


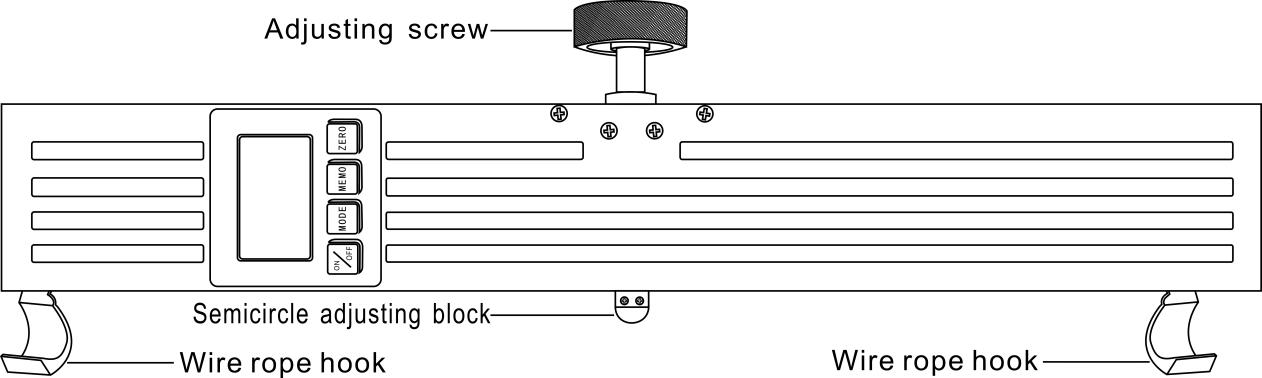
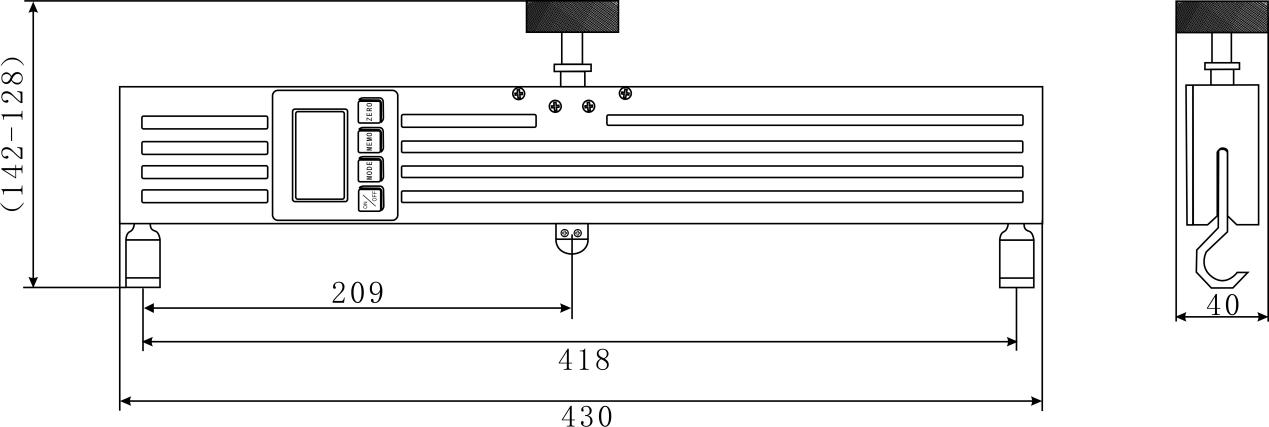
1 Portable: The tensile testing machine adopts high-strength aluminum alloy structure, which is light in weight, small in size and convenient to carry. One person can complete all operations.
2 The performance of the instrument is stable and the accuracy is high. When the data of the steel wire rope under test is consistent with the data of the wire rope tensile testing machine, the measurement accuracy can reach 5%.
3 Light weight, simple structure, convenient operation, suitable for any occasion.
4 The instrument has 3 preset wire rope diameter models, and you only need to select the correct wire rope number when measuring.
5 LCD displays numerical force, making reading more convenient.
6 Three units: N, Kg, Lb can be switched mutually.
7 The instrument can store 383 pieces of measurement data, and the data can be output by the computer.
| Model | DGZ-Y-3000 | DGZ-Y-5000 | |||||
| Number | 1 | 12 | 4 | 4 | 1 | 2 | 3 |
| Diameter | Φ4 | φ6 | φ8 | φ10 | φ11 | φ13 | φ16 |
| Range | 3000N | 5000N | |||||
| Min. Load Division Value | 1N | ||||||
| Scientific measuring range | 10%~90% | ||||||
| Accuracy | ≦±5% | ||||||
| Power | 7.2V 1.2V×6 NI-H Battery | ||||||
| Charger | Input :AC 100~240V Output:DC 12V 500mA | ||||||
| Weight (Kg) | 1.4 kg | ||||||
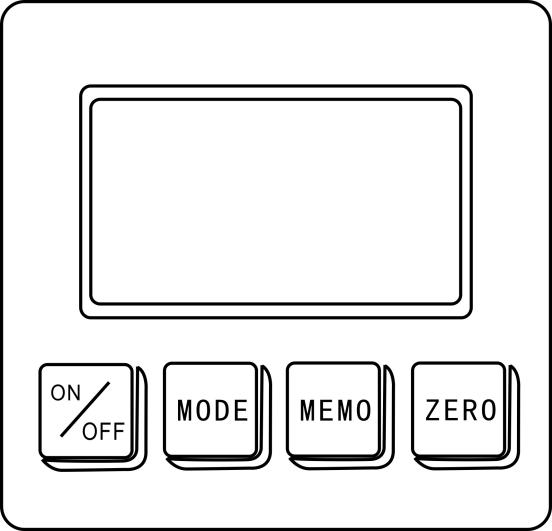
2.3.1 ON/OFF: Press ON/FF key to turn on or turn off .
2.3.2 MODE:turn on and then press “MODE” key to enter into setting menu, the user can enter into setting menu by “MODE” key ,also can save data when setting data by “MODE” key ; If you are in measurement interface ,press “MODE” key for 5~6 seconds to turn over the the force value on display.
2.3.3 MEMO:When you are in measurement mode,press “MEMO” key to save data. Press “MEMO” key for 5 seconds to check the saved data.When you are in “MODE” menu ,the “MEMO” is as a move function.
2.3.4 ZERO: In measuring mode , press “ZERO” key to clear data .In”MODE” menu ,the “ZERO’ key can be as return function.

(UNIT)unit setting:Turn on ,the instrument enter into measuring interface,press “MODE’ key into setting menu,press “MODE” again enter into unit selection,press “MEMO” button to choose unit , after unit selection, press “MODE” button for saving and back to setting menu.As the below picture shows:
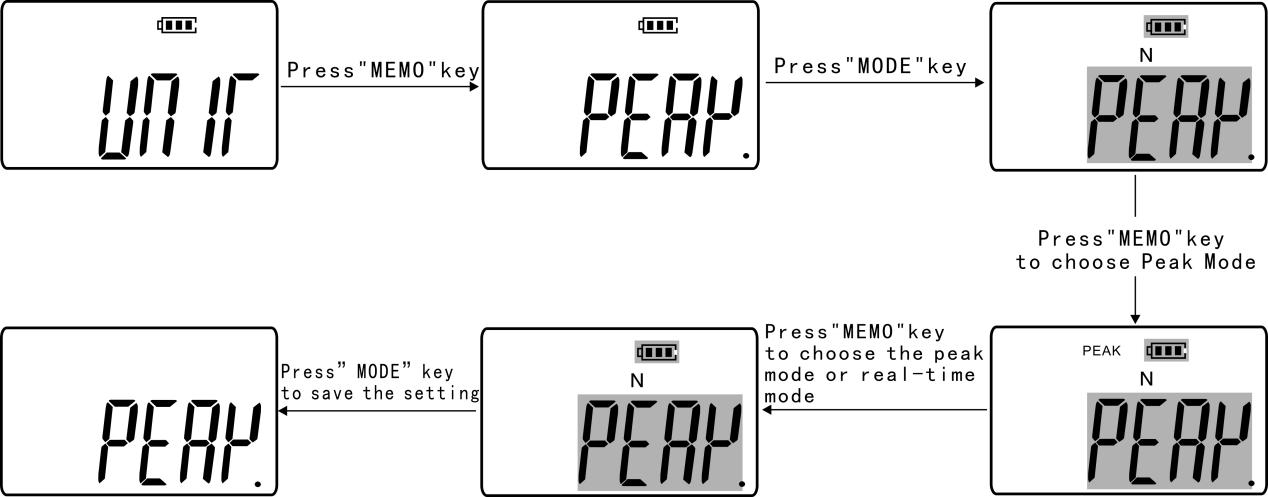
(PEAK)Peak Mode Setting: When in the setting interface, press “MEMO” key to choose “PEAK”, press “MODE” key enter into it, press “MEMO” key to choose Peak Mode or Real-time Mode. When screen shows “PEAK” means in Peak Mode, otherwise means in Real-time Mode. Press “MODE” key to complete and return to setting interface. As picture shows:
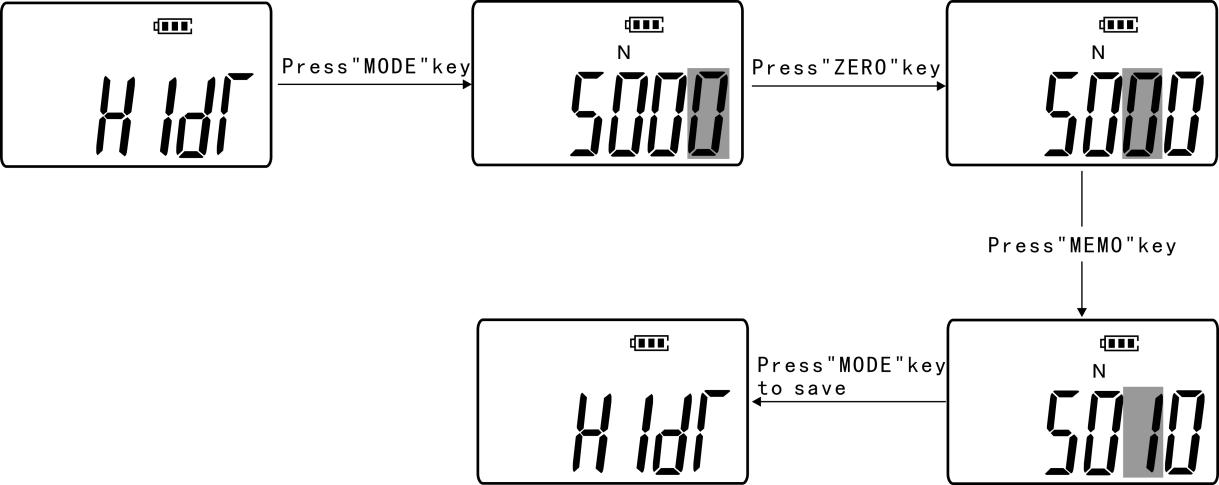
(HIDT)Upper limit testing value setting::When in the setting menu, press “MEMO” key to choose “HIDT”, press “MODE” key enter into it, press “MEMO” key and “ZERO” key to set upper limit value, press “MODE” key to complete and return to setting interface, As picture shows:
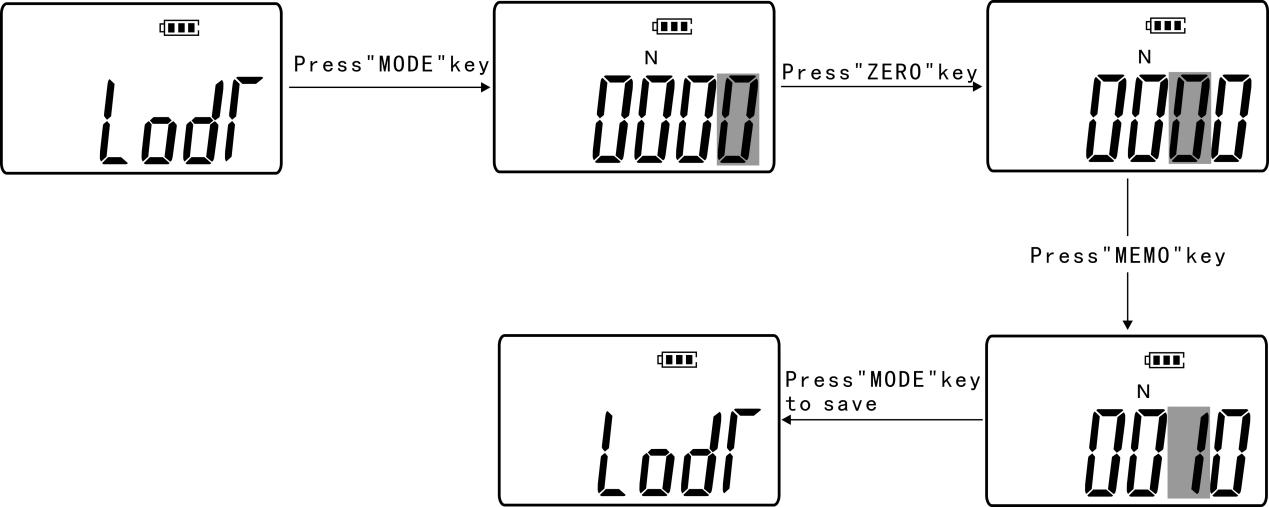
(LODT)Lower limit testing value setting: When in the setting interface, press “MEMO” key to choose “LODT”, press “MODE” key enter into it, press “MEMO” key and “ZERO” key to set lower limit value, press “MODE” key to complete and return to setting interface.
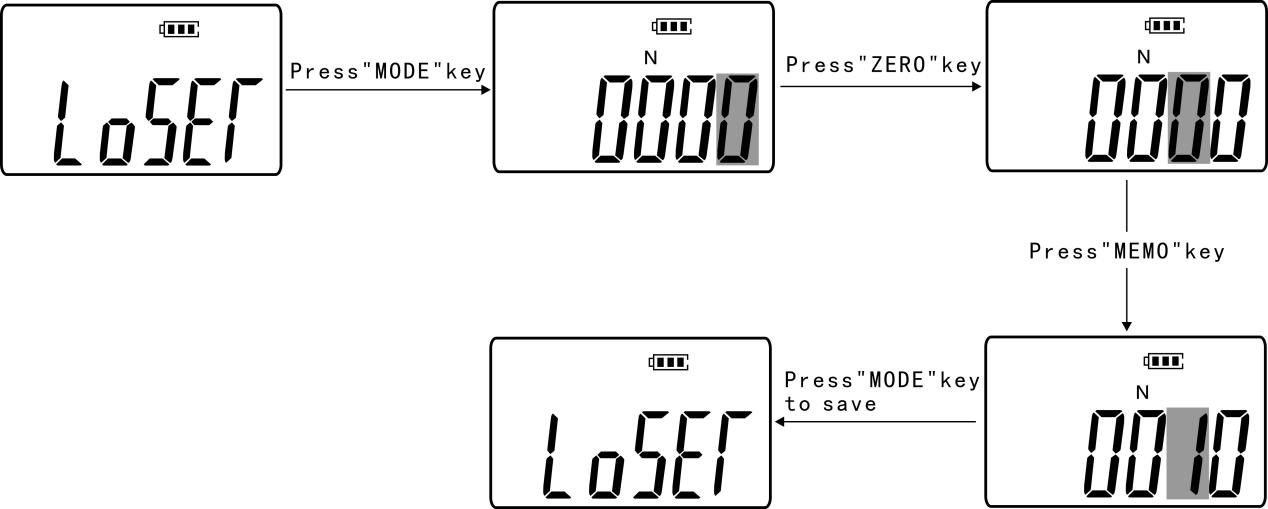
(LOSET)The minimum peak value saved:In the Peak Mode,when current value is lower than this value,the peak value will not be saved.When in the setting interface,press “MEMO” key to choose “LOSET”,press “MODE” key enter into it,press “MEMO” key and “ZERO” key to set value,press “MODE” key to complete and return to setting interface.As picture shows:
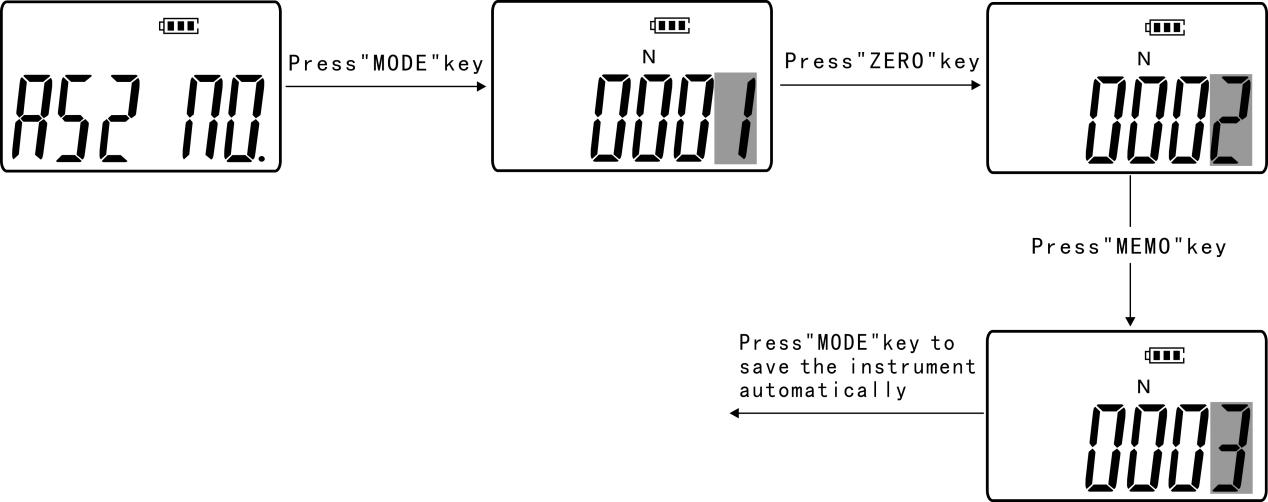
(ASZ NO)Selection of rope No.: When in the setting interface, press “MEMO” key to choose “ASZ NO”, press “MODE” key enter into it, press “MEMO” key to choose the rope No. you need, press “MODE” key to complete and the instrument auto shut down, and turn on it again to start testing:
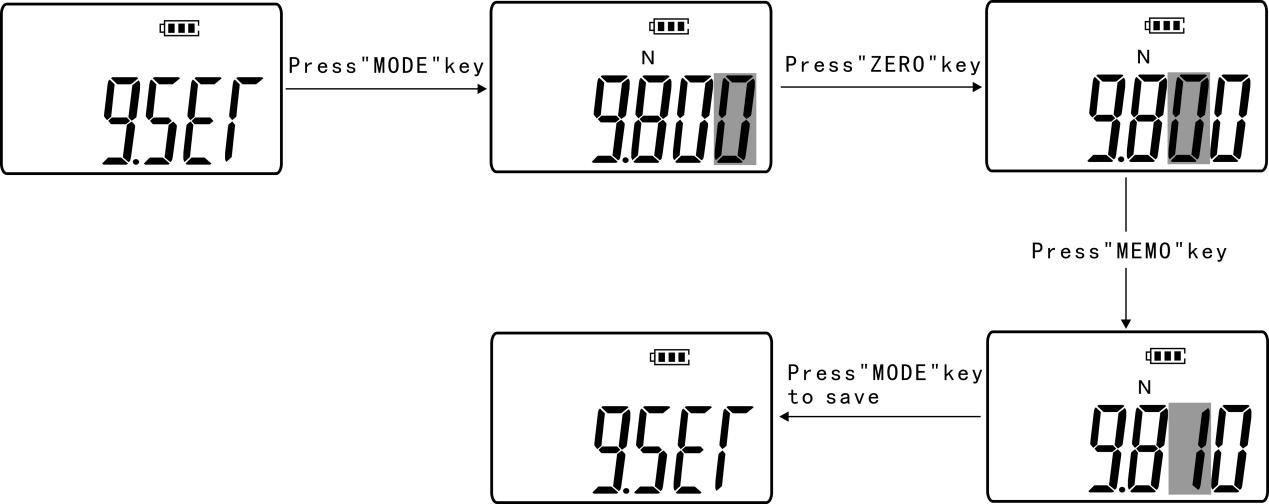
(G.SET) Acceleration of gravity setting: The user can set acceleration of gravity according to their area. The default value is 9.800.
Press “MEMO” key to choose “G.MODE”,press “MODE” button to enter
into setting , to press “MEMO” and “ZERO” button to adjust the number ,to choose the number you need and press “MODE” button return to setting menu. As the picture show:
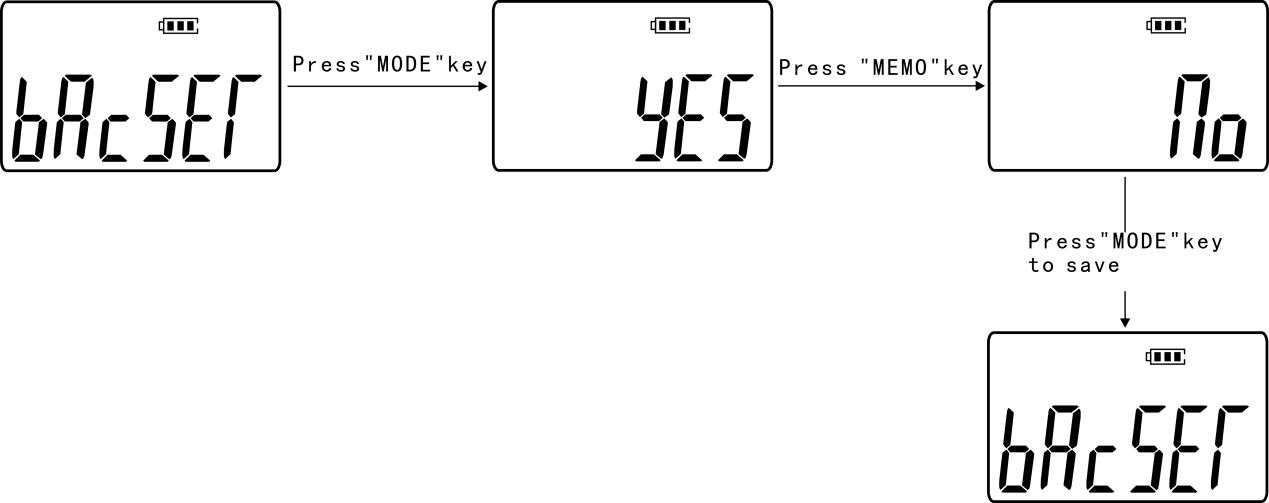
(BACSET)Back light function setting:Press “MEMO” button to choose“BACSET”,When in this mode, if you select “(yes)” means open back light function, if you select”(no)” means close back light function, then press “MODE” key for saving and return to setting interface.As picture shown:
Please use the matching charger for charging, otherwise, it will cause circuit failure, or even a fire.
Do not use the power supply beyond the rated voltage of the charger, or it may cause electric shock or fire.
Do not plug or unplug with wet hands, or it may cause an electric shock.
Do not pull or drag the power wire to unplug the charger plug, in order to avoid the electric shock caused by breaking the wire.
Please use soft cloth to clean the instrument. Immerse the cloth into the water containing detergent, wring it dry and then clean up the dust and dirt.
| 1 | Elevator Tension meter | 1 MODE |
| 2 | Charger | 1 piece |
| 3 | USB cable | 1 piece |
| 4 | Certificate and warranty card | 1 piece |
| 5 | Manual | 1 piece |
| 6 | Certificate of inspection | 1 piece |
| 7 | Desiccant | 1 piece |


